Thursday, March 15, 2012

Spring is in the Air!

The weather has been absolutely gorgeous this week!  Highs in the 70s and sunny all week!  Linus and I have been so excited to soak up a little sun so I haven’t got much sewing done.

We’ve spent our afternoons outside, and it’s usually a fight to get him to come in for supper.  I’ve tried to take some pictures but as most 16 month olds he won’t sit still.
He's running out of most of the shots!
All this warm weather has got me thinking about spring and Easter.  This line, Dear Stella, came into the shop recently and to me it just says spring!
Dear Stella
These are just a few of the fabrics.  There’s also an absolutely adorable paisley which goes with it!  This line just reminds me of rain boots, little ducklings, and spring flowers.
Hopefully if all goes as planned I’ll have a cute little tutorial to go with it soon, and wait until you see what I did with the scraps!
But until then get out and enjoy this beautiful spring weather!
Tamara

P.S. I apologize for the amount of exclamation points in this post. I feel like I could burst into song about this lovely weather!

Sunday, March 11, 2012

Charm Pack Happy Birthday Banner Tutorial

I see banners and garland everywhere these days.  I haven’t been too quick to jump on the bandwagon but one banner I knew I couldn’t resist was the Happy Birthday Banner. 

Growing up we always had a Happy Birthday tablecloth brought out for each special occasion and I’m hoping this fabric Happy Birthday Banner will be our little family tradition.

I’m not in love with the pennant shaped banners and I wanted something which was quick and easy but still looked finished.  So I decided to use a charm pack!  (If you don't mind cutting your own squares this also a great scrappy project.)
Linus's Happy Birthday Banner

Happy Birthday Banner Charm Pack Tutorial

1  5” charm pack (or 41 squares)
¼ yard of coordinating fabric
Heat n’bond


Note: Make sure when you are picking out fabric it is not too busy.  I dearly love this Salt Air line which I used for the tutorial but it was maybe a little busy for a banner.  If you really love a certain line but you’re worried about how busy it is throw in a few solids for the letters.


1.      Layout charm pack.  You will need 14 squares for the background (HAPPY BIRTHDAY + a space between the two words).  Pick 13 different squares for your letters.  (This is the hardest part.  Try to vary the colors and patterns and make sure the fabric used for a letter will not blend into the background square.) I like to write the order or letter on the back of each square of fabric so I can keep it straight.
Notice the two red scallop pattern pieces next to each other; this is what you want to avoid.

(Of course you could also do what I did and spend time laying it out and then sew it on backwards and make it work, because I’m too lazy to rip it out and start over.)

2.     Once you’ve chosen your layout, use the remaining squares to back the background squares.  With right sides together, sew around three sides, turn and press.  The open side will be the top of the square.
Ready to press!

3.      Cut your binding.  I use three strips the width of the fabric at 1 ¼” wide.  Once you have the three strips sewn together turn one side under ¼”.

4.      The next step is to sew the squares to the binding. Leave a 12-15” tail of binding before starting the first square. Make sure you sew them in the order you laid out.


It works best for me to have my binding on the bottom right side up and then place my squares on top of the binding (face down) as I sew.  (See the diagram above.)  If you do it this way you’ll start with the last letter “Y” and work your way through “Happy Birthday” backwards. 
5.      After you have all the squares sewn on, trim the tails on either side to same length.
6.     Press the binding away from the squares and then back down over the raw edge.  You will also have to press the remaining unfolded side and the ends of the tails under ¼".

7.      Finally topstitch binding catching it on the underneath side to finish.
Do you recognize this picture from a previous post?
8.      Next iron on Heat n’ Bond following manufacturer’s directions to letter squares.  Trace and cut or use cutting machine to cut out letters.  Your letters can be any font but it works best to keep them about 4” tall and no more than 4” wide.

9.     Iron letters to squares and viola!  Now it’s time to bake the cake!

Here's our banner in use.


Tuesday, March 6, 2012

Don't Try This at Home + Giveaway Winner

Last weekend I thought I’d sneak in a few minutes of sewing during nap time.  This is what followed…
This is what happens when you change feet, but forget to take the machine off the button hole stitch.

If that wasn’t bad enough, I needed pink thread to finish up a project and I had a spool with a just a little left on it. (I could see the spool through the thread.)  I decided to just go for it.  Apparently you can get pretty close to running out of thread, but I wouldn’t recommend it.
You can see where the end of the thread is at on my machine.

Barely made it!
So the moral of this story is stop by Always in Stitches and pick up a few extra packs of needles today!  You never know when you're going to need them.
And yes this was a brand new needle before I mangled it :(


And without further ado, the winner of the Dr. Seuss Giveaway is …
Cathy (cdc)  who said, “I've been following the blog for awhile. My favorite Dr Seuss book is "Oh the Places You'll Go"
Cathy, you can pick your panel up at the shop!  Thanks everyone for playing and be on the lookout for a new tutorial this weekend!
Tamara

Friday, March 2, 2012

"Happy Birthday, Dr. Seuss!" Giveaway

In case you hadn't heard today is Dr. Seuss's birthday. Around here Dr. Seuss is a favorite. We just read The Foot Book last night. So I think it's only fitting to celebrate his birthday with a fun Dr. Seuss Giveaway!
Here's what's up for grabs: A Cat in the Hat Panel by Robert Kaufman!

Finished panel example from the shop and the panel we're giving away.


Here are the rules:
1.     You must be a follower of the blog, new or old. (If you aren’t currently a follower, just join through the Google Friend Connect on the right side panel.)
2.    Leave a comment telling us your favorite Dr. Seuss book.
3.   You must be able to come to Always in Stitches to pick up your prize.

4.   The giveaway will be open through Monday night,      March 5.  I’ll announce the winner on Tuesday.

And if you don't know what to fix for dinner yet tonight maybe you should try some
green eggs and ham! 
Tamara

Wednesday, February 29, 2012

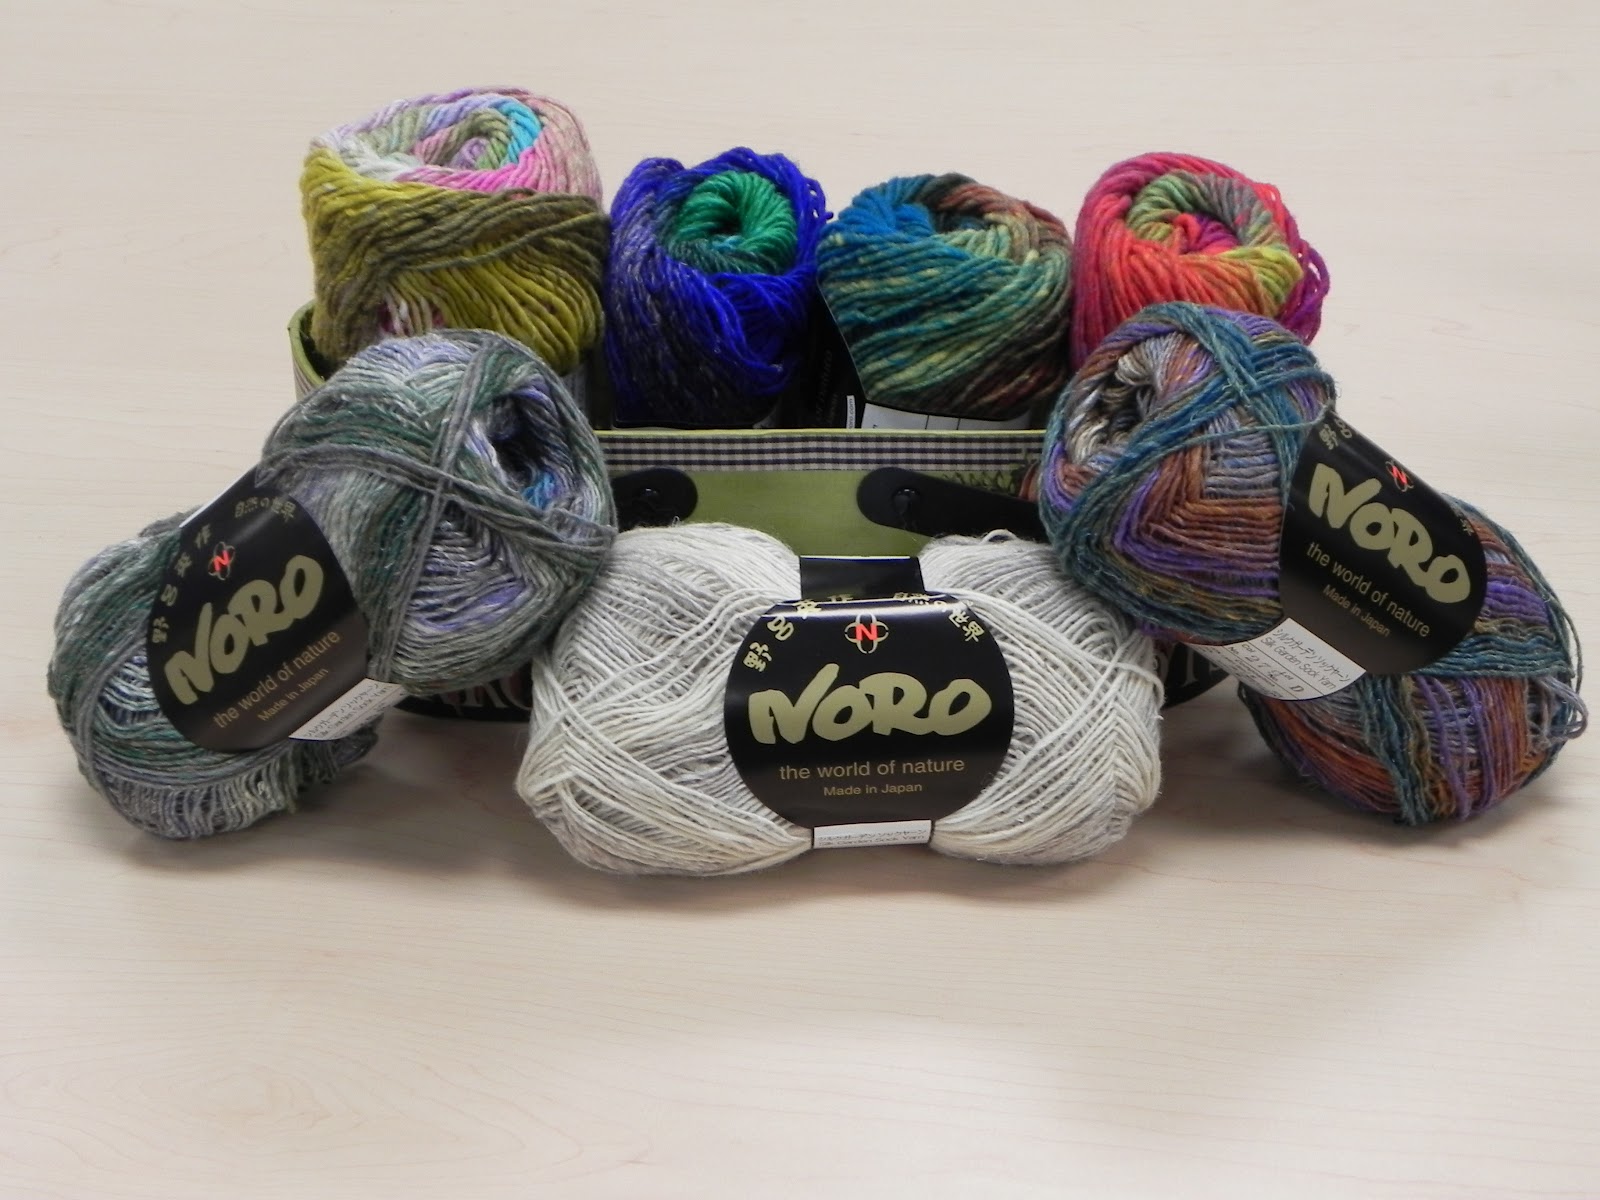
Say Hello to NORO!

All those that have more patience than me knit and crochet, check out the new NORO yarn from Japan at the store. 


The color of the yarn changes as you knit with each color vivid and true.  New blends include Silk Garden Worsted Weight and Silk Garden Sock Yarn.
Parrot Scarf
Check out Penny's Parrot Scarf made from 2 contrasting scans of NORO.  Her Parrot Scarf Pattern is free with the purchase of any 2 scans of NORO.
Tamara

Saturday, February 25, 2012

Changing Pad Tutorial


When Linus was born I thought I would do all this sewing for him. The changing pad which came with the diaper bag someone gave me had no way to keep it rolled up so I dreamed up this idea with velcro using PUL and diaper fabric from the shop and a little Michael Miller dots as binding. Of course this one isn't for Linus and I never have gotten around to making one for him, but it's the thought that counts, right?
Baby Changing Pad with velcro closure
Baby Changing Pad

½ yard PUL fabric

½ yard batting

½ yard diaper fabric

¼ yard cotton for binding

1” square of velcro


Lay diaper fabric on top of batting. (Batting and diaper fabric do not have to be exactly the same size.  You will trim down to size later.)
Batting with diaper fabric layered on top
Iron and pin together layers to keep in place.  Then quilt batting and diaper fabric together.
Quilting batting and diaper fabric together

Once you have quilted the two layers together, trim down to 25 ½"  by 14".
Next cut a 25 ½” x 14” rectangle of PUL fabric. Sew the rough side of the velcro to the right side of the PUL fabric centered about 6 ½ inches from the top.

Layer the two pieces of the changing pad with the inside piece batting side up and the PUL right side up on top of the batting. (I like to baste the PUL onto the rest of the layers at this point to keep it from slipping when you attach the binding.
Next from the binding fabric, cut two 3¼” by 2” rectangles and binding.  I got by with two strips of straight double fold binding. 
Place two rectangles right sides together.  Sew ¼” seam around three sides leaving a short end open.  Turn and press.  Sew soft side of velcro to flap centered about a ¼” down from closed short side.

Sewing on binding and flap
With the PUL up, pin flap (velcro up) to the short side with velcro on it so the raw edge of the flap will catch in the binding seam.  Pin binding and sew.  Finish by turning binding and handstitching to diaper fabric.


And as Linus would say, "Ta-da!"

Stay tuned for the cute wipes case I made to go with this!

Tamara


Saturday, February 18, 2012

New Square on the Quilt

My name is Tamara and I'm a quiltaholic.  Ok so really only when I find time in between my real job, refinishing a house, taking care of my son, cooking dinner, cleaning the house, and laundry. (Laundry tends to pile up at our house.  Just ask my husband.) 

I have been quilting for about 10 years, and sewing for... well...longer.  I'll be posting to the Always in Stitches blog about my projects, new fabric to the store and more.  I have a baby changing cover tutorial in the works, but in the mean time let me tell you a little about myself.

1.  I love to quilt and sew as long as its not clothes. (10 years of sewing in 4-H cured me of ever wanting to make clothes for myself again.) 

2. My mother-in-law, Cindy, works at Always in Stitches.  Both my husband and father-in-law have learned not to ask us how much we spend on fabric.

3. I have an adorable 15 month old son who for sake of this blog will be called Linus.  He drags his blanket everywhere with him if I let him.  If he were ever to lose it I would definitely be inspired to learn how to crochet.

Sewing with Linus


4. We are currently refinishing our home.  So you are likely to see pictures of my sewing room as I get it organized, and I am always open to tips and ideas!

5. I love doing lots of other crafty things so if the occassional non-sewing craft project makes it on here that's why.  (And who knows maybe I'll take up knitting or crocheting after all!)

So here's what I want to know from you:  What would you like to see on this blog?

                                     Tamara